 I never do this. Why? Because if you work at a large firm with many servers, then you will have to sort thru tons of servers to find the one you want.
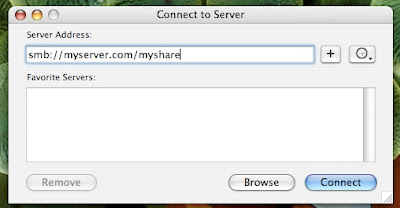
In this scenario, I use the Connect to Server command. To do this, get the following info first:
1. The Server Name.
2. Is this a windows server or a mac server.
3. Is there a specific share or folder to which you want to connect?
After all those questions have been answered, let's connect.
1. Go to Finder and hit ⌘ + k.
2. Time to type in all that info you collected.
If it is a windows share, type in "smb://"
If it is a mac share, type in "afp://"
3. Enter in the server address, this can be the server name(i.e. myserver.com) or the ip address (i.e. 127.0.0.1).
4. If you are connecting to a specific windows share or directory, add it to the end of the address.
5. You should have something like "smb://myserver.com/myshare". If you want to bookmark this server, hit the "+" button. It will add it to you Favorite Server list.
6. Now hit enter. A window will pop up and ask you to enter in you user and password info. If you would like to never enter in this info again, check the "Add to Keychain" box.
7. If you did not specify the share in the address, a box will pop up to ask you which share you want to mount.
8. If you have gotten this far, the share will mount on your desktop like and other disk would.
There you have it, Connect to a Network Drive in a few steps!
enjoy.
No comments:
Post a Comment